This post may contain affiliate links, including those from Amazon Associates. If you make a purchase through these links, I may earn a commission at no additional cost to you. Learn more about our affiliate policy.
I’ve always loved the kind of seasonal décor that looks just as good in daylight as it does in candlelight. Halloween can easily tip into kitsch, but with clay, you can create pieces that feel festive and still fit beautifully into your home’s style. The best part? Many of these Halloween clay crafts are simple enough to make in an afternoon and stylish enough to leave out well past October 31.
Whether you lean toward charming and whimsical or modern and minimal, these ideas blend spooky fun with elevated design. All you need is some air-dry clay, polymer clay, or even oven-bake clay, a few basic tools, and a dash of imagination.
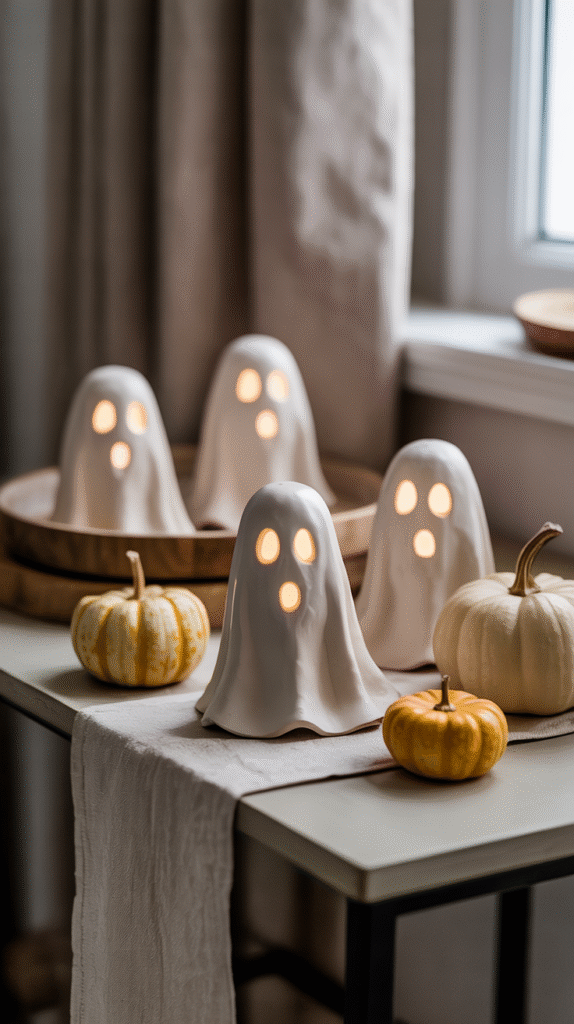
1. Charming Clay Ghost Sculptures

A beginner-friendly favorite that works in almost any space.
Watch this quick tutorial to see how simple and expressive these ghosts can be, then come back to customize them your way:
You’ll need: air-dry clay, small rolling pin, foil or upside-down bowl, straw or toothpick, decoupage glue, matte sealer.
Steps:
- Shape a foil ball or use an upside-down bowl as your base.
- Roll out a sheet of clay and drape it over the base, letting folds form naturally.
- Smooth the surface gently and cut out eyes with a straw or toothpick.
- Let dry completely.
- Optionally decoupage with patterned napkins or paint, then seal.
Style tip: Arrange several together on a console table with LED candles.
2. Ghost Tea-Light Holders

A glowing twist on the classic ghost sculpture.
You’ll need: air-dry clay, cone mold or paper cup, parchment paper, straw or toothpick, LED tea-lights.
Steps:
- Wrap your mold in parchment to prevent sticking.
- Drape rolled-out clay over the mold, leaving space underneath for a candle.
- Cut small eye holes.
- Let dry fully before removing from the mold.
- Place an LED tea-light inside for a soft glow.
Style tip: Make them in varied heights for a layered, styled display.
3. Elegant Clay Knot Sculptures
Minimalist, sculptural décor that subtly nods to Halloween.
You’ll need: polymer clay in matte black, stone gray, or metallic; baking mat; sculpting tools.
Steps:
- Condition the clay by rolling and kneading until soft.
- Roll into thick ropes.
- Form loose knot shapes without pulling too tightly.
- Bake according to package instructions.
- Let cool before displaying.
Style tip: Style on coffee tables with seasonal florals or mini pumpkins.
4. Monster Pinch Pots
Whimsical and functional, perfect for candy or small plants.
You’ll need: air-dry clay, clay tools or toothpicks, acrylic paints, paintbrushes, sealer.
Steps:
- Roll clay into a ball.
- Press your thumb into the center to form a bowl shape.
- Pinch the edges outward evenly.
- Add facial features or pumpkin ridges with tools.
- Let dry, then paint and seal.
Style tip: Group several in different designs for a playful kitchen display.
5. Halloween Coasters or Wall Art

Functional décor you can customize endlessly.
You’ll need: clay (air-dry or polymer), rolling pin, cookie cutters, paint, sealer, magnets or hooks (optional).
Steps:
- Roll clay to about ¼-inch thickness.
- Cut shapes using cookie cutters — pumpkins, bats, moons.
- Smooth edges with a damp finger.
- Dry or bake as directed.
- Paint with simple Halloween motifs, seal, and optionally add magnets or hooks.
Style tip: Use as coasters for drinks or hang in a small seasonal gallery.
6. Pumpkin-Shaped Bowls or Planters
A slightly more advanced but rewarding project.
You’ll need: clay, real pumpkin or ball mold, clay tools, paint, sealer.
Steps:
- Cover your mold in plastic wrap.
- Press clay over the mold, smoothing evenly.
- Use a tool to press grooves into the sides for pumpkin ridges.
- Let dry, then remove from the mold.
- Paint in desired color and seal.
Style tip: Paint the interior in metallic tones for a warm contrast.
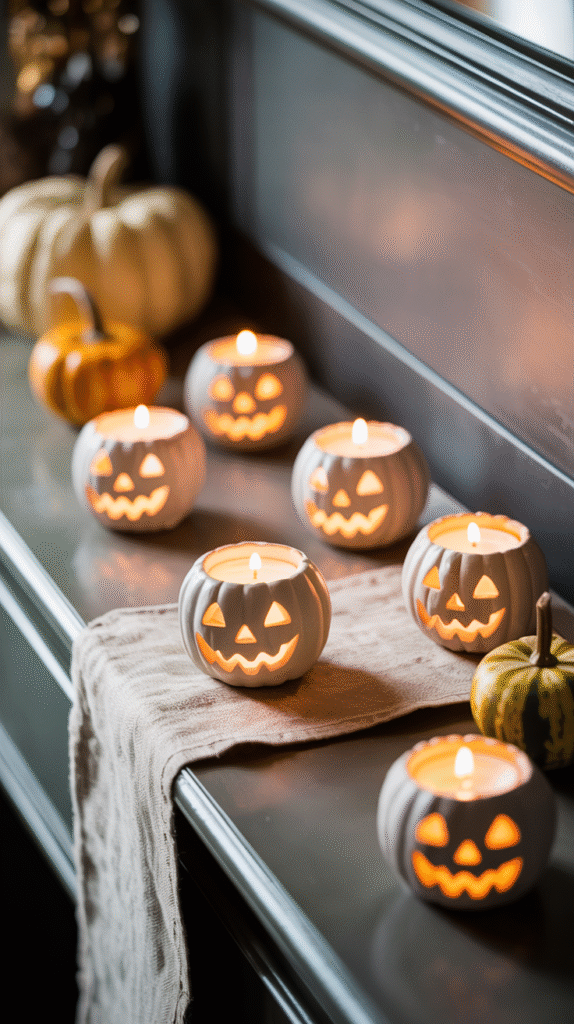
7. Clay Jack-o’-Lantern Votives

Miniature pumpkins with a flickering surprise inside.
You’ll need: clay, carving tools, LED tea-lights, paint, sealer.
Steps:
- Shape clay into small pumpkins.
- Hollow out the center enough to fit a tea-light.
- Carve simple faces before drying or baking.
- Paint in chosen colors and seal.
- Insert LED tea-lights for a cozy effect.
Style tip: Use as table décor for a Halloween dinner party.
8. Spooky Spider Clay Pots
Fun, slightly silly pieces that kids will love too.
You’ll need: clay, black paint, pipe cleaners, glue, paintbrushes.
Steps:
- Form small pots with air-dry clay or use pinch pot method.
- Let dry completely.
- Paint pots black.
- Attach pipe cleaner legs with glue.
- Add eyes with paint or glued-on clay details.
Style tip: Use as candy holders or succulent planters.
9. Ghost or Bat Clay Magnets
Subtle seasonal touches for your fridge or office.
You’ll need: polymer clay, cookie cutters, baking tray, magnets, strong adhesive, paint.
Steps:
- Roll out clay to ¼-inch thickness.
- Cut ghost, bat, or pumpkin shapes.
- Bake according to package directions.
- Let cool, then paint and seal.
- Glue magnets to the back and let dry.
Style tip: Mix with year-round magnets for a pop of seasonal charm.

Supplies and Tips for Success
Essential supplies:
- Air-dry clay or polymer clay
- Rolling pin or clay roller
- Clay tools or simple kitchen substitutes
- Acrylic paints in seasonal shades
- Matte sealer or decoupage glue
- LED candles for illuminated projects
Tips:
- Smooth edges with a damp finger before drying/baking.
- Follow clay package instructions closely for baking times.
- Always seal air-dry clay for durability.
- Don’t be afraid of nontraditional colors for an elevated look.
Bringing It All Together
Halloween clay crafts are the perfect combination of creativity and style. With just a handful of supplies and a bit of time, you can create décor that feels personal, polished, and ready to display. Start with one or two projects that catch your eye, match them to your home’s color palette, and enjoy the process. By the end, you’ll have pieces that bring the season to life in a way that’s uniquely yours.


