This post may contain affiliate links, including those from Amazon Associates. If you make a purchase through these links, I may earn a commission at no additional cost to you. Learn more about our affiliate policy.
There’s something special about stepping into a thrift store with an open mind.
Rows of forgotten pieces wait quietly for someone to see their potential. With a bit of imagination and a few weekend hours, these finds can become decor that looks designer rather than secondhand.
You don’t need a workshop or a big budget, just curiosity and the willingness to start.
These tutorials are easy enough to complete over a weekend and will have your space looking designer level on a thrift store budget.

Paint Old Vases to Mimic Stoneware

A single coat of textured paint can transform shiny glass into sculptural ceramics. These pieces bring warmth and quiet elegance to shelves, mantels, and coffee tables.
What You’ll Need
- Thrifted glass or ceramic vases
- Matte or chalk paint in neutral tones (sand, clay, ivory)
- Baking soda or texture additive
- Paintbrush or sponge
Steps
- Wash and dry the vase thoroughly.
- Mix one cup of paint with a tablespoon of baking soda for a matte, grainy texture.
- Brush or sponge the paint on in light layers, leaving subtle variation.
- Let dry, then add a second lighter color for depth.
- Seal with a clear matte finish if desired.
Pro Tip: Group three vases of different heights together. The mix of shapes creates a sculptural, high-end effect.
Create a Sculptural Side Table from a Lamp Base

Lamp bases often have beautiful silhouettes that go unnoticed. With a round wood top, they become elegant mini plinths for plants, candles, or art books.
What You’ll Need
- Sturdy thrifted lamp base
- Wooden round or charger for the top
- E6000 adhesive and hot glue gun
- Matte paint or spray paint
Steps
- Remove the bulb socket and electrical wiring.
- Clean the base and glue the wood round on top. Use hot glue to set quickly and E6000 for lasting strength.
- Once secure, paint the entire piece one color for cohesion.
- Allow to dry overnight before styling.
Quick Tip: Choose a matte finish like plaster white or deep charcoal. Gloss can make the piece look store-bought instead of sculptural.
Style Thrifted Hard-Cover Books Like Decor

Coffee-table books add height and polish to any surface, but new ones can be pricey. Thrifted hardcovers can do the same job for just a few dollars.
What You’ll Need
- Hard-cover books
- Neutral fabric or kraft paper if re-covering
- Scissors and double-sided tape
Steps
- Remove dust jackets to reveal cloth or linen bindings.
- If colors clash, wrap covers in linen or kraft paper using tape inside to secure.
- Stack two or three books, largest on bottom.
- Top with a small bowl, candle, or decorative object.
Style Note: Choose titles related to art or travel. Even covered, the spine shape adds character.
Tutorial Inspiration: DIY Fabric Covered Books From Mod Podge
Transform Thrifted Frames with Digital Art Prints

Old frames are full of character, and with digital art, you can create high-end wall decor affordably.
What You’ll Need
- Thrifted frames in good condition
- Digital print download from Etsy or an open-source gallery
- Printer or local print shop
- Matte Mod Podge and brush (optional)
Steps
- Remove the old art and clean the glass and frame.
- Repaint or refresh the frame finish—matte black, brushed brass, or soft cream work beautifully.
- Print your chosen artwork to fit the frame size.
- Brush a thin coat of matte Mod Podge with gentle strokes to create a canvas-like texture.
- Reassemble and display.
Related: How To Create a Moody Romantic Gallery Art Wall
Get visually inspired with this video of the above projects from Tasha At Home:
DIY Textured Plaster Art Panels

Large wall art makes a room feel finished, but store-bought canvases can be costly. Plaster panels give you the same impact for a fraction of the price.
What You’ll Need
- Blank canvas or MDF board
- Joint compound or plaster
- Putty knife or spatula
- Neutral paint
- Matte sealant
Steps
- Spread joint compound over the surface with a spatula, creating organic movement.
- Carve gentle lines or arcs into the damp plaster.
- Let it dry fully for at least 24 hours.
- Paint in soft layers of beige, ivory, or taupe.
- Seal with matte polycrylic for protection.
Tutorial inspiration: DIY Textured Canvas Art by Jenna Sue Design Co.
Quick Tip: Lean one large piece on a console rather than hanging it. The relaxed styling feels sophisticated and modern.
Faux Travertine Finishes for Trays and Tabletops

Travertine’s subtle veining looks luxurious, and it’s surprisingly easy to mimic with layered paint techniques.
What You’ll Need
- Wooden or ceramic tray
- Acrylic paints in off-white, beige, and gray
- Sponge and small brush
- Matte sealer
Steps
- Paint a warm beige base layer and let dry.
- Sponge on irregular patches of off-white and pale gray, blending softly with a dry brush.
- Add fine speckles using a toothbrush for realistic variation.
- Allow to dry and seal with a matte topcoat.
Tutorial inspiration: Faux travertine tutorial by Amy Howard
Pro Tip: Keep your hand light. Gentle texture and restraint are what make the look feel expensive.
Fluted Details with Pole Wrap

Fluting adds texture and visual rhythm, making even the simplest furniture feel custom.
What You’ll Need
- Pole wrap sheets or half-round trim
- Cabinet, nightstand, or side table
- Measuring tape and saw
- Wood glue and clamps
- Paint or stain
Steps
- Measure your surface and cut pole wrap to fit.
- Apply wood glue evenly and press into place.
- Clamp until dry overnight.
- Sand edges lightly.
- Paint or stain to match your palette.
Tutorial inspiration: Fluted Molding Dresser by Cuckoo 4 Design
Quick Tip: Try fluting on just one piece in a room. A single texture accent keeps a small space calm but interesting.
Pedestal Bowls from Mixed Thrifted Parts

Pairing mismatched items can lead to surprisingly sculptural pieces. A bowl and a candlestick together can look like something from a boutique home shop.
What You’ll Need
- Medium bowl (ceramic, wood, or glass)
- Candlestick or small pedestal base (can be another smaller bowl)
- E6000 glue
- Paint or plaster finish
Steps
- Clean both pieces and apply glue to join them.
- Center carefully and let cure overnight.
- Paint in neutral matte tones or apply plaster for a stone effect.
- Use as a centerpiece, fruit bowl, or catchall dish.
Tutorial inspiration: Pedestal bowl DIY by Sunnyside Home
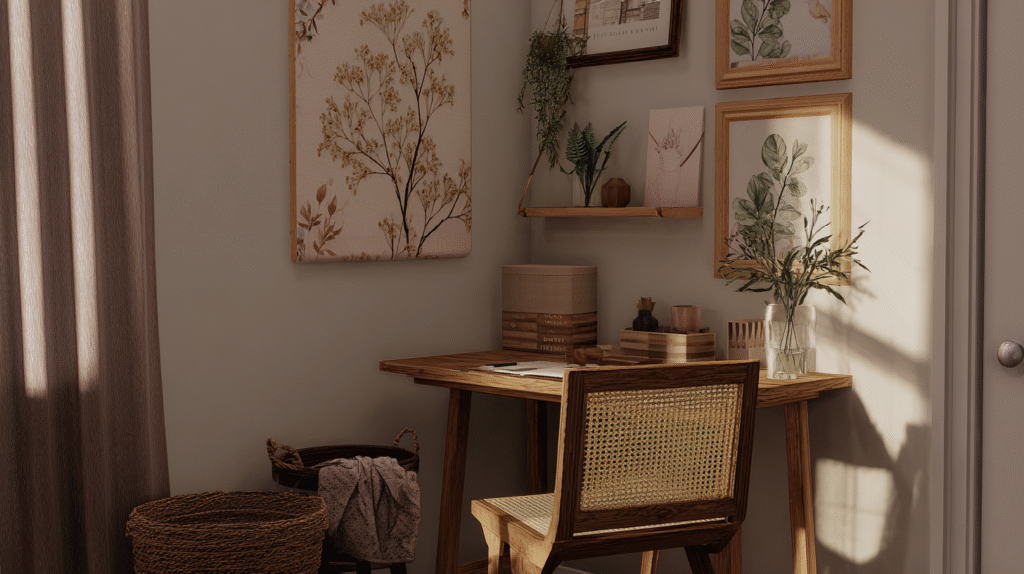
Curate a Layered Shelf with Your Thrifted Finds

The beauty of thrift flipping shows best when all your projects come together. A well-styled shelf feels like a living story told through texture and tone.
What You’ll Need
- A mix of vases, books, and framed art from previous projects
- Small woven basket or box for storage
- Greenery, candles, or natural elements
Steps
- Start with a consistent color palette of two or three tones.
- Place larger, heavier pieces on one side for visual grounding.
- Mix vertical and horizontal shapes—art against books, round beside square.
- Leave open space between groupings for calm balance.
- Step back and adjust until it feels cohesive.
Pro Tip: Rearrange seasonally instead of buying new decor. Moving what you already own can refresh a room just as powerfully as something new.
Related: Modern Vintage Display Cabinet Ideas
Closing Reflection
Every object you bring home from a thrift store carries potential. When you paint, refinish, or reimagine it, you’re creating art that feels personal and grounded.
Start with one small idea like a vase, a frame, or a bowl and let it build your confidence. Beauty doesn’t come from buying more. It comes from noticing what already exists and shaping it into something that feels like home.