This post may contain affiliate links, including those from Amazon Associates. If you make a purchase through these links, I may earn a commission at no additional cost to you. Learn more about our affiliate policy.
There’s a special kind of peace that comes from decorating your tree with things you’ve made yourself. The rhythm of cutting fabric, tying ribbon, and smelling pine needles feels grounding—a small act of beauty in the middle of winter.
Cottagecore captures that same quiet magic. It’s about handmade textures, natural materials, and imperfect charm. These twelve simple ornament ideas bring the feeling home using affordable, beginner-friendly projects that celebrate nature and creativity.
If you love handmade textures and cozy, nature-inspired designs, you might also enjoy exploring these French country cottage Christmas tree decoration ideas for a similarly soft and rustic seasonal look.
Felt Mushroom Ornaments

Imagine your tree dotted with tiny red mushrooms, as if a woodland story came to life indoors. The felt softens the branches, and the hand-stitched edges add a gentle, homemade charm.
Materials
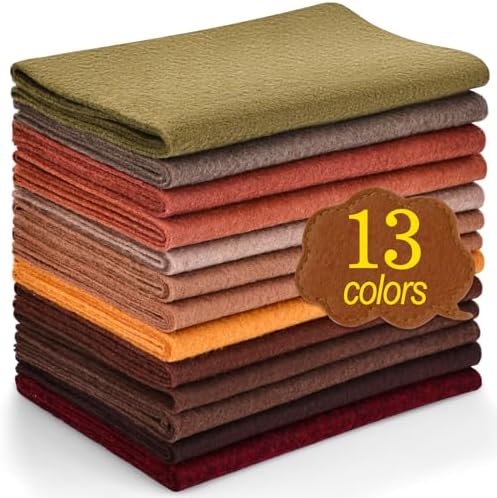
- Red or earthy colors and beige felt
- Cotton or scrap fabric for stuffing
- White paint or thread
- Twine or ribbon
Cut two felt caps for each color and one beige stem. Stitch the pieces together, stuff lightly, and add white dots of paint or felt. Thread twine through the top and hang. Each one will look slightly different, that’s where the charm lies.
Here is a helpful tutorial for a version of these cute mushroom ornaments:
Wood Slice Forest Animals

Painted wood slices add a touch of woodland simplicity. Their natural grain and soft edges bring warmth to even the smallest space.
Materials
- Small wood slices size 3.5″ wide (see below)
- Woodland wildlife stencils size 3″ wide (see below)
- Paint or paint pens
- Pencil for tracing
- Twine or jute


Either trace simple silhouettes like foxes, deer, or birds with stencils and paint them in, or paint directly into the stencils for a minimal look.
Once dry, thread twine through and hang on your tree. The mix of wood and matte paint creates a calm, rustic texture that pairs beautifully with greenery and candlelight.
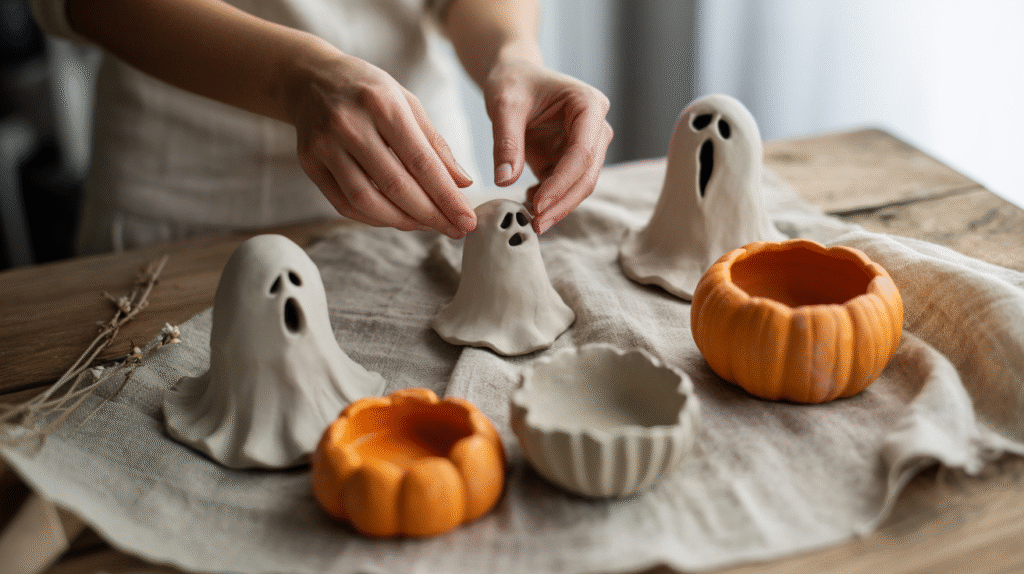
Air-Dry Clay Leaf Imprints

A walk outside becomes part of your Christmas décor with these pressed-leaf ornaments. Their subtle patterns and chalky finish bring a natural texture that suits both rustic and minimalist trees.
Materials
- Air-dry clay
- Rolling pin
- Real leaves or herbs
- Straw or skewer
- Ribbon or twine
- Acrylic Paint Markers in Earth Tones
Roll out the clay to about a quarter inch thick. Press a leaf into the surface, peel it away, and cut around the imprint.
Poke a hole near the top and let dry overnight.
Once hardened, color in the imprints in your chosen color and thread with twine or ribbon. Each one captures the quiet beauty of winter’s landscape.


Here is an in depth tutorial for these cute ornaments:

Pressed Flower Ornaments

These delicate ornaments capture the quiet poetry of summer meadows within a clear, glasslike frame. Pressed flowers sealed between two acrylic discs create a light-catching keepsake that feels timeless and handmade.
Materials
- Two clear acrylic ornament discs (same size)
- Pressed wildflowers or greenery
- Clear epoxy or superglue
- Tweezers
- Ribbon or twine
Lay one acrylic disc flat on your workspace. Using tweezers, arrange your pressed flowers carefully across the surface—think of how they’ll appear once layered, leaving space around the edges.
Add a thin layer of clear epoxy or a small amount of superglue to the back of each flower to secure it to the disc. Once your arrangement is set, place tiny dots of glue across the tops of the flowers and gently position the second disc on top, aligning the edges. Press lightly to seal, allowing the adhesive to dry completely before handling.
Thread ribbon or twine through the ornament’s hole to hang. The transparent layers give each piece a floating effect, letting the colors of the petals glow softly against the tree lights.

Here is a full tutorial for this method:
Mini Twig Wreaths with Moss

These tiny wreaths bring a fresh, forest look and a rustic softness to your décor. They’re lovely hung on a tree or grouped together as a natural garland.
Materials
- Thin flexible twigs
- Floral wire or twine
- Moss, pine sprigs, or dried flowers
- Hot glue gun
- Ribbon
Bend twigs into small circles and secure with twine. Glue bits of moss and greenery around the base, then tie on a small bow or dried flower. A few irregular shapes add character—the imperfection is what makes them feel alive.
Vintage Button and Linen Baubles

These ornaments feel like something passed down, a mix of linen, applique elements, and time-worn buttons that tell quiet stories.
Materials
- Squares of linen or muslin fabric
- Foam, paper, or balled-up scrap fabric for the round base
- Vintage buttons, lace, or applique flowers
- Needle and thread or hot glue gun
- Jute or narrow ribbon for hanging
Lay your fabric square flat and place the round base in the center. Gather the fabric up around it, smoothing folds as you go, and tie securely at the top with twine or ribbon.
Adjust the gathers until they drape softly. Sew or glue vintage buttons or bits of lace around the surface, spacing them naturally so they feel collected rather than perfect. Add a loop for hanging.
Embroidered Fabric Hoops

Small embroidery hoops turn simple stitches into tiny works of art. Even the most minimal design feels meaningful when framed in wood.
Materials
- Mini embroidery hoops or kit
- Cotton or muslin fabric
- Embroidery thread and needle
- Ribbon
Stretch the fabric in the hoop, tighten, and trim the excess. Stitch a small motif like snowflakes, stars, or initials, then tie ribbon through the clasp. When grouped together, they create a charming gallery effect among the branches.

Paper Stars from Old Book Pages

Made from vintage book pages or sheet music, these stars bring a literary touch to your Christmas décor. They’re light, nostalgic, and full of quiet beauty.
Materials
- Book pages or sheet music
- Scissors and glue
- Hole punch and twine
- Optional gold or bronze paint
Here are two video tutorials for two star shaped ornaments:
Five Pointed Star
Multi-point Star
Pinecone and Bead Tassels
These add depth and movement, balancing natural pine with smooth wood beads. Their simplicity makes them easy to blend with other ornaments or use as garlands.
Materials
- Small pinecones
- Wooden beads
- Jute twine
- Scissors
Thread beads and pinecones alternately on twine, tying small knots between each to hold them in place.
Hang individually or drape them along your tree as a garland. The look is earthy, timeless, and perfectly understated.
Clay Cottage Houses

Tiny clay cottages bring the essence of a quiet winter village to your tree. Each one feels like it could belong in a storybook, with hand-shaped walls, uneven edges, and roofs that look dusted with snow.
Materials
- Air-dry clay
- Sculpting tools or a small knife
- Toothpick or skewer
- Paint and fine brush
- Ribbon or twine
Roll out your clay and cut small rectangles for the cottage walls. Use your sculpting tool to add doors, windows, and rooflines, pressing gently to create texture.
For a chimney or roof peak, shape and attach small clay pieces while the surface is still soft. Poke 2 small holes at the top for hanging, then let the cottages dry completely.
Once cured, paint them in soft whites, creams, or muted pastels. Finish with a piece of ribbon or twine threaded through the top holes.
Grouped together on a branch, these tiny houses feel like a peaceful village glowing in the stillness of winter.
Foraged Acorn Ornaments

Gathered from nature walks, acorns are nature’s own ready-made decoration. Their form and color blend beautifully with any cottagecore palette.
Materials
- Real acorns
- Paint
- Decorative jar or thrifted bowl
Paint the acorns in earthy tones or metallics, reattach the caps, and cluster them in a decorative jar or bowl. You can also tie them to gifts for a natural accent.
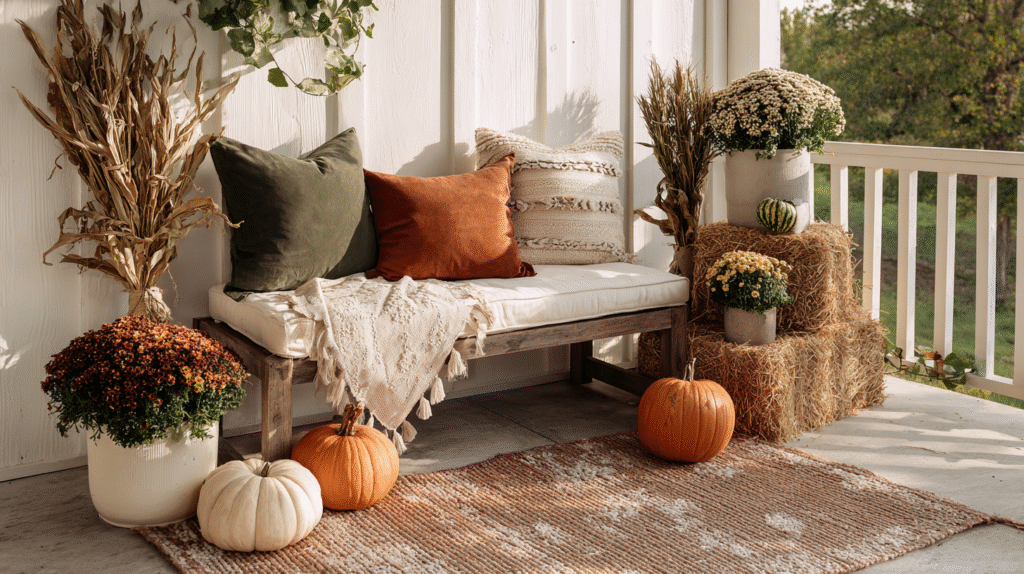
Styling Your Handmade Ornaments
Combine textures that tell a story like felt beside clay, paper beside wood. Keep your palette grounded in linen white, sage green, blush, and honeyed gold. Replace metal hooks with twine or silk ribbon for a gentler look.
If you live in a small space, scatter ornaments beyond the tree. Hang them from a garland, a branch in a vase, or even along a bookshelf. Cottagecore décor isn’t about perfection, it’s about the warmth of things made with heart.
For more inspiration on bringing cottage charm into small spaces, see how to create a cottage Christmas look in a small apartment using simple, affordable touches that keep the season feeling intimate and warm.
A Creative Reminder
Your handmade ornaments carry more than decoration; they hold memory, time, and care. When you choose to make something by hand, you invite calm into your space. Start with one ornament that inspires you and let the process unfold naturally. Beauty follows wherever you slow down enough to create it.