This post may contain affiliate links, including those from Amazon Associates. If you make a purchase through these links, I may earn a commission at no additional cost to you. Learn more about our affiliate policy.
There’s something deeply satisfying about walking into a thrift store and spotting a piece with hidden potential.
Maybe it’s a chipped vase, an old lamp base, or a forgotten frame, something most people would pass by.
But with a bit of imagination and a few simple tools, that cast-off object can become a designer-level accent that gives your home texture and soul.
DIY thrift flips are about creating beauty through ingenuity, turning ordinary things into artful, personal details.
You don’t need a big budget, special tools, or a full workshop to do it.
These nine projects are proof that with a little paint, fabric, and creativity, you can craft a home that feels curated, not cobbled together.

Chalk-Painted Aged Vessels

If you love the look of old-world pottery and sculptural ceramic pieces, you can recreate that same depth and character with a simple aging technique using chalk paint, texture additives, and a bit of patina work. Even the most basic thrifted vase can take on an earthen, hand-thrown quality with layered color and gentle distressing. These aged vessels add grounded beauty to shelves, consoles, and styled vignettes.
What You’ll Need
- Chalk paint in two or three earthy tones
- Texture additive such as baking soda or fine sand
- Utility brush or stippling brush
- Soft cloth or sponge
- Dark wax or diluted brown paint wash (optional for patina)
Steps
- Clean the vessel thoroughly so each layer adheres well.
- Mix your first chalk paint color with a small amount of baking soda for a gritty texture.
- Dab the mixture onto the surface using a stippling motion to create dimension. Let it dry.
- Add a second color in uneven patches to mimic natural mineral variation.
- Use a soft cloth or sponge to soften transitions and blend the tones.
- If desired, add a diluted brown paint wash or dark wax in recessed areas to create an aged patina.
- Style the finished piece with branches, dried stems, or leave it empty as a sculptural accent.
Find more ideas and inspiration with this full tutorial from Jenna Pierce:
Reupholstered Thrifted Stool or Chair
Textiles transform furniture faster than any other medium. A worn thrifted stool, for instance, can look high-end after a simple reupholster. A worn seat becomes refined with fresh fabric. The updated textile turns an overlooked piece into a custom accent.
What You’ll Need
- New upholstery fabric
- Staple gun and staples
- Screwdriver
- Scissors
- Optional foam padding
Steps
- Remove the seat from the frame using a screwdriver.
- Take off the old fabric and use it as a template for the new piece.
- Replace or add foam if the cushion needs more structure.
- Pull the new fabric taut and staple it to the underside of the seat.
- Reattach the seat to the frame and trim any excess fabric.
Here is an easy to follow tutorial from HGTV on how to quickly reupholster a chair:
Boho Rattan-Look Lampshade
You can upcycle a discarded lampshade frame into a woven, rattan inspired light using cane webbing and veneer. The full video tutorial walks through each step clearly, and this overview gives you the essentials.
What You’ll Need
- Old lampshade frame
- Cane webbing
- Wood veneer edging
- Hot glue gun and glue sticks
- Xacto knife
- Scissors
- Clamps
- Iron
Steps
- Remove the old fabric from the frame and clean off any glue residue.
- Measure and trim the cane webbing to fit the height and circumference of the shade.
- Wrap the cane around the frame and secure it with hot glue, using clamps as needed.
- Trim the edges and stitch the seam together with loose cane fibers for a clean join.
- Add a veneer border by ironing it in place along the top and bottom rings.
- Trim and finish the edges, then let everything set before styling.
Follow along with the full tutorial from Louise George Michael here:
Mosaic Framed Mirror

A simple thrifted mirror becomes a statement piece with a handmade mosaic border. This project adds texture, color, and a crafted feel without requiring advanced tools.
What You’ll Need
- Thrifted mirror or frame
- Mosaic tiles or broken ceramic pieces
- Tile adhesive
- Grout
- Sponge
- Painter’s tape
Steps
- Clean and dry the mirror, then tape off the glass to protect it while you work.
- Spread a thin layer of tile adhesive along the frame.
- Arrange your mosaic pieces in a layout you like and press them into the adhesive.
- Let everything set, then apply grout over the tiles.
- Wipe away excess grout with a damp sponge and allow it to cure fully.
- Remove the tape and clean the mirror for a crisp finish.
Find a full tutorial from Instructables here.
Hanging Wall Planter

Wall decor doesn’t have to be flat. A shallow thrifted vessel can become an easy wall planter with nothing more than twine or leather cord and a simple hook. This method works well for bowls, small buckets, or lightweight ceramic pieces.
What You’ll Need
- Shallow bowl, small bucket, or lightweight vessel
- Twine or leather cord
- Wall hook or nail
- Scissors
- Plants or dried stems
Steps
- Add trailing greenery or dried botanicals and adjust the cords so the vessel sits level.
- Choose a vessel that feels light enough to hang safely on a single hook.
- Cut two equal lengths of twine or cord and tie them securely around the vessel, creating a balanced hanger.
- Gather the cords at the top and knot them to form a loop.
- Hang the loop on a wall hook or sturdy nail.
Decorative Tray with Inlay or Fabric

A simple tray gains elegance when lined with patterned fabric, textured paper, or veneer. The surface detail elevates coffee tables and nightstands.
What You’ll Need
- Thrifted tray
- Fabric, wallpaper, or veneer
- Scissors
- Decoupage glue or epoxy resin
Steps
- Measure the interior base of the tray.
- Cut your material to fit the shape precisely.
- Brush the base with decoupage glue and lay the material flat.
- Smooth out air bubbles and let it dry.
- Seal with a thin layer of decoupage glue or epoxy for durability.
Bookends or Sculptural Objects from Found Pieces
Heavy thrifted objects become striking bookends or small sculptures when unified with a fresh finish. The consistent color highlights the form.
What You’ll Need
- Two heavy objects such as statues, stone pieces, or candleholders
- Matte spray paint or acrylic paint
- Optional wooden blocks for height
- Strong adhesive
Steps
- Clean each piece thoroughly.
- Paint the objects in a cohesive color for a unified look.
- Attach them to wooden blocks if you want added height.
- Let the paint cure before placing them on shelves.
- Arrange them beside books or art pieces for sculptural presence.
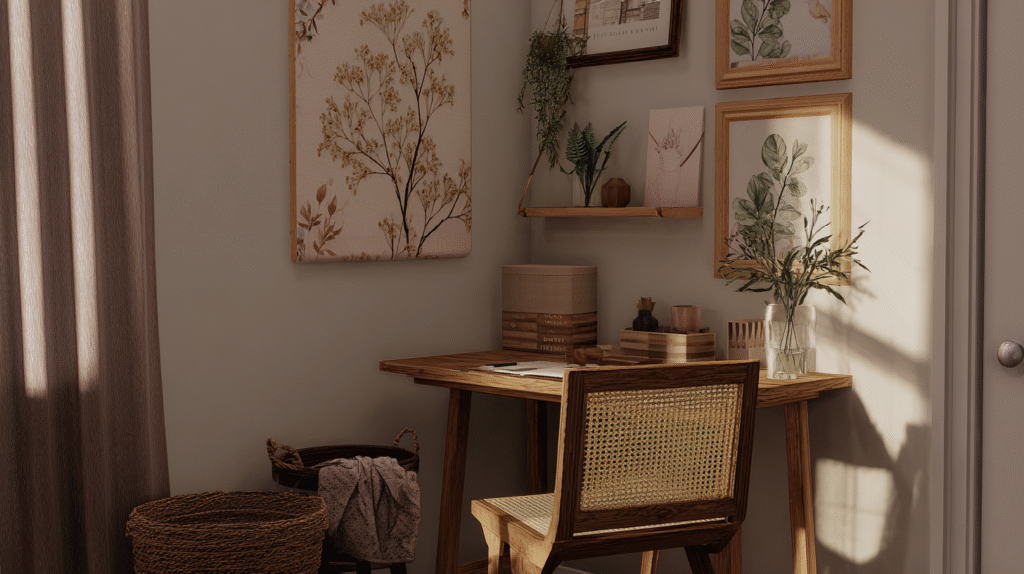
Statement Wall Gallery with Vintage Frames

Few DIYs make a room feel more designed than a cohesive gallery wall. Collect mismatched thrifted frames in various sizes, then paint them all one color, either soft neutral for calm, or matte black for contrast.
Fill them with prints, pages from old books, fabric swatches, or family photos.
Consistent spacing and repetition of color keep the wall feeling curated rather than chaotic. It’s the kind of detail that instantly gives your space that “styled by a designer” finish.
Find a full tutorial for creating a thrifted gallery wall here.
Pleated Cottage Style Lampshade
A thrifted lampshade frame transforms beautifully with a soft, pleated cover that brings a cozy cottage look to any room. The full video walks you through the detailed method, and this quick overview covers the essentials.
What You’ll Need
- Old lampshade frame
- Lightweight cotton or linen for pleats
- Hot glue or fabric adhesive
- Scissors
- Bias tape or simple trim
Steps
- Remove the old shade and clean the frame.
- Cut long strips of fabric and fold them into even pleats.
- Wrap the pleated strips around the frame and glue them in place.
- Overlap each section slightly for a consistent finish.
- Add trim along the top and bottom to secure the edges and complete the look.
Follow along with the entire tutorial from Mimzy & Company:
Tips for Making DIYs Feel Designer-Level
Stick to a cohesive palette. Even the most creative mix looks sophisticated when colors flow naturally from one project to another.
Use quality finishes. A good brush, smooth paint application, or well-stapled fabric goes a long way. Attention to detail is what makes pieces look expensive.
Layer texture and sheen. Mix matte paint with glossy accents, rough fabrics with smooth ceramics. It keeps the eye engaged and the space balanced.
Don’t overdo it. Designer rooms always leave breathing room. Edit often. Let a few statement pieces lead the story.
Style with intention. How you place your finished pieces matters as much as how you make them. Group objects by height and tone, vary scale, and always leave a little negative space.
A Home That Reflects Creativity
Every thrifted project you make carries a little of your imagination. These pieces hold more than aesthetic value—they hold the memory of transformation. That’s what makes a space feel truly personal.
Start with one project this weekend. Maybe a painted vase, maybe a fabric-covered lampshade. As you work, notice how the process itself brings calm and creativity. You’ll see your home differently, not as a collection of items, but as an evolving reflection of you.
Designer-level style isn’t about spending more, it’s about seeing more. It’s the art of turning overlooked things into beauty, one creative choice at a time.